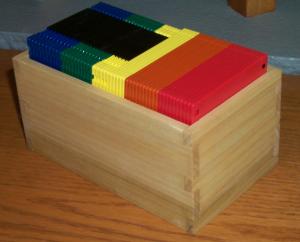
The Friends of the Issaquah Library sell flippy disks (3-1/2 inch computer disks aren't floppy) to library patrons who forget to bring their own. I wanted to try making a dovetailed box, so I made one to hold the disks in the drawer while they're waiting to be sold.
The box is made from a chunk of 3/4-inch poplar left over from our video shelf, and a piece of 1/2-inch oak from something else. I resawed the poplar into two 3/10-inch boards (says something about the quality of my resawing and planing skills ;-) with a japanese rip saw, the only thing I had with a narrow enough kerf to leave me with any board after sawing down the middle. I need to get around to making a bow-style resaw one of these days.
Once I got the thin boards surfaced so they were pretty flat, I cut them to length and width and shot the ends to be nice and square with a smoother and my bench hook used as a makeshift shooting board (another shop project I need to get to.)
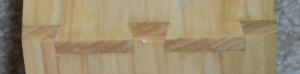
I used the dovetail instructions from St. Roy's (Roy Underhill) book, The Woodwright's Shop as my guide. Since these are the first dovetails I've ever cut, I did careful layout and marked every cut line and every waste area. I started to cut on the wrong side of a line a couple of times even so, but fortunately didn't dig down below the part of the joint that would be planed off when it was finished. That book describes how to cut pins first, so that's the way I did it. I didn't make skinny little pins since I figured I'd be lucky to just get the thing to fit together without getting all fancy.
I used my leg vise to hold the work while I did the saw cuts. It didn't work very well with this very thin stock as I don't have the necessary fineness of adjustment at the foot of the vise to get the jaws square. I'll have to do something about that. I cut to my pin lines with a Disston dovetail saw, then cut out most of the waste with a coping saw and pared to the lines with a chisel. I trimmed my less-than-stellar saw cuts with a xacto-style knife.
With the pins cut, I marked the tails on their boards with the same knife then darkened the lines with a sharp pencil and marked the waste again. I cut one joint at a time and did the final fitting of that joint before going on to the next. The first couple needed quite a bit of trimming to get them to go together, but by the last one, I only had to trim a little bit after sawing and chiseling.
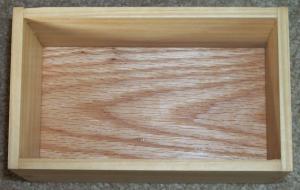
I hadn't really figured out how to put a bottom in the box until I got the dovetails together. I had thought about rabbetting the bottom to accept a board, but with thin stock, there wasn't much to rabbet. I decided to run a shallow groove around the inside of the bottom of the box and rabbet a 1/2-inch piece of oak to slip into the groove. I don't own a plow plane yet, so I cut the groove by scribing a line with a marking gage and then working a 1/4-inch chisel along that line until I had something that seemed deep enough. For the tail boards, the groove fell into the pin space, so I just went off the end of the boards, but for the pin boards, I did a stopped groove so it wouldn't show on the side of the box. Once the groove was cut, I rabetted the stock for the bottom with my #78 steel rabbet plane. I should have set up the nicker or something because I got more of a slanted rabbet, but I was able to square it up with a chisel. It's not beautiful, but nobody will see it unless they go looking so I'm not going to lose any sleep over it.
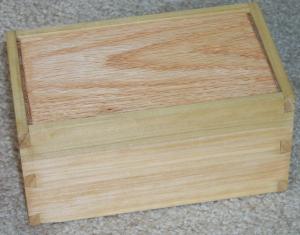
I glued up the dovetails but left the bottom floating loose in its groove to allow for seasonal movement. Once the glue dried I planed of the protruding ends of the pins and tails and slapped on some BLO (boiled linseed oil). Not too bad for four or five hours of relaxing work.
No power tools were used in the making of this box
This page last updated 7/6/2002
TomeCat | Home |
Woodworking |
Projects | Contact Webmaster