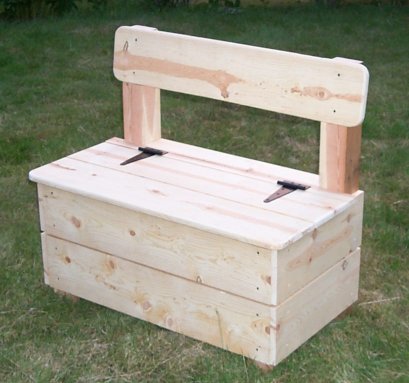
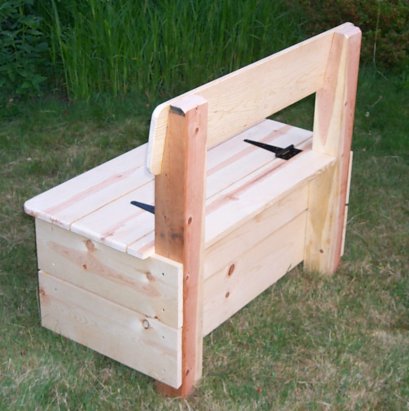
There's no joinery to speak of, just boards glued and screwed to four legs. The plans called for 1x6 boards and 2x2 legs, but my big galoot butt wouldn't fit on a bench made of a pair of 1x6's, so I scaled it up a bit using 1x8's and 4x4's. The result looks even more like a crate than the original plans, but it doesn't sag when I sit on it, and the storage portion has more space.
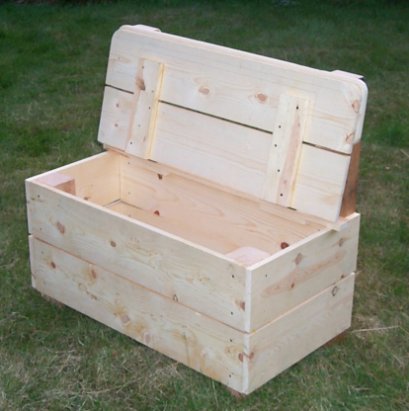
This was built in a weekend and a bit. The first day I cut most of the boards to length. The second day I assembled the basic box, and mounted the back. Then in a few more hours over the course of about a week I got the seat put together and installed. There was a problem with the plan for the seat. The rear piece that the hinges screw onto is notched to go around the rear legs which leaves a 1 inch wide by 3-1/2 inch long piece of short grain pine floating out there with nothing much to support it. I figured I'd probably break that off in the course of making the cutouts, so I just cut it off in the first place making the cutouts two easy cuts instead of the three cuts, one of them tricky that Blizzard wanted. This was really just a problem because of my redesign since his original legs were only 2 inches square, the short grain piece was a little sturdier. Though it sure looks like one of them broke off and was screwed back on in the picture in the book ;-)
I mostly used just a crosscut saw and a rip saw to make this, but also used a jack plane and a smoother to even up my rip cuts. I used a coping saw to cut the radius on the seat corners (used a can of WD-40 as a template), then rounded the seat edges over with a few passes with a plane. I used my steel rabbet plane to clean up the angled cut in the back legs that holds the seat back. All the pilot holes for the screws were drilled using a modern countersink bit chucked in a Millers Falls #2 (dual pinion model) eggbeater. I used my proto-bench for some of the work, but most of this was done on a couple of 2x8's clamped to my folding plastic sawhorses on the lawn outside the shop where the light lasts longer. I used a 1 inch chisel for some trimming and to pare away dried glue squeezeout. Also used a marking gage, a rule, a pencil, and a whole bunch of clamps (mostly to hold stuff in place while I drilled pilot holes) The screws are all robertson head (except the ones which came with the hinges (phillips)) which I drove using a power drill robertson bit held (loosely) in a 1/4" socket on a screwdriver handle.
Haven't decided how to finish it yet. Probably either milk paint, or some colored stain, maybe green like used in the book.